Simple Woodworking Projects You Can Do at Home
Author: Dianne Kumar

Book Series: Make It Yourself Series
1. Woodworking Made Simple
Although you have a number of different hobbies to choose from, woodworking is certainly one that you would want to consider. After all, it is quite surprising in its diversity and regardless of whether you decide to take it up full time or if you're just using it to pass a few hours during the day, it will offer you a lifetime of enjoyment. Not only that, it is a hobby that requires a certain level of skill but it can also be enjoyed by somebody who has never picked up a woodworking tool before. When you add to that the fact that you are getting something that you can hold in your hand and appreciate when you are finished, it really is the perfect hobby.
Some people tend to avoid the hobby of woodworking because they feel as if it is too difficult to start. Although it certainly is true that you can take the hobby and make it a profession, that doesn't necessarily mean that the layperson has to avoid it. The fact of the matter is that this publication will provide you with all that you need to know so that you can begin some simple woodworking projects at home and learn about the hobby as you go along.
There are a number of benefits that are associated with woodworking and we will review those benefits in chapter 2 of this publication. By understanding the benefits that are involved, it can provide you with the motivation and the confidence necessary to get started. You will come to appreciate the hobby more and more as you experience those benefits in your life.
What Is Necessary to Get Started?
Like any hobby, there are certain things to consider before you get started with woodworking. Fortunately, you can begin as simply as you want and you can make it as complex as you like as you go along. We will discuss some of the basic woodworking tools that are necessary in order to get started with this hobby. Of course, the tools that you use can be as simple as a pocketknife, but learning more about the tools that are available will help to heighten your appreciation and get you started.
It is also important to know the different types of woods that are available and what you would want to choose, in order to get started properly. There is a surprising diversity in the type and hardness of wood and as you change from one type to another, you will see that they work differently and take a different amount of effort. We will have a brief review of different types of wood so that you can get started now.
Finally, we are going to talk about the safety precautions that must be observed in order to get started with woodworking. Although any hobby can be dangerous, you will be working with tools that are quite sharp and at times, could injure you quickly and easily. There is no need for you to be frightened of the tools, however, you just need to have the proper respect and understand how to operate them safely. We will discuss the basics of woodworking safety in Chapter 5.
What Projects Will We Cover?
If there is one thing that you will learn quickly about woodworking, it's the fact that you can take it in almost any direction. We are going to review a number of simple projects, however, that you could make easily at home. Included among those projects are some as simple as making a wooden toy box or a work bench. We will also cover some that are a bit more complex, including making your own jigsaw puzzle or perhaps making a hide a key box that will be both convenient and unique.
After covering some specific projects that can be made at home by beginners, we will take a step back in time and consider one of the oldest forms of woodworking, whittling. This is something that you may find a lot of pleasure in, and it may be the type of woodworking that you take part in on a regular basis. When you understand how to whittle, you will find that it gives you the opportunity to make something unique while at the same time, passing the time on a lazy afternoon.
The art and hobby of woodworking is one that is certainly worthy of your attention. As you learn more about this hobby and get started with it, you will find that it is something that is easy to appreciate. It is also something that requires a level of skill, but you can build that skill as you go along.
2. Why Take up Woodworking as a Hobby?
The process of working with wood is more than just a simple hobby; it is a skill that takes a lifetime to develop and one that you will enjoy mastering. There are also many benefits that are associated with this hobby, as you will soon learn. In this chapter, we are going to review some of the primary benefits that you will experience when you take up woodworking as a hobby. There may also be additional benefits that are not covered that you will appreciate as well. It is all part of the beauty of the hobby and one that you will enjoy starting.
Physical Benefits - Some hobbies may provide you with something that you can look at or perhaps something that you can appreciate but when it comes to woodworking, you will end up with a physical product that you can both hold in your hand and appreciate the journey that it took to make it. This type of physical benefit is one that is certainly worthy of your attention.
Family - The hobby of woodworking is one that you will want to share with others, especially those within your own family. It doesn't matter if you are teaching your children how to work with wood so that you can do it together or if you are sharing your creations with others in your family; it is something that will help to draw you closer together.
Relaxing - There is no doubt that we all have a high level of stress in our lives today. Overcoming that stress can be difficult but when you have a relaxing hobby, it makes it much easier. Woodworking is such a hobby and you will find that the relaxation that is available is something that you will appreciate on a daily basis. It is not going to take all of your stress away from you but it can help you to come down from your high stress level from time to time.
Money - You will also discover that there are some financial benefits associated with woodworking. One of those benefits is seen in the fact that you can create your own products rather than purchasing them, and you can often do so at a higher quality but a lower price. In addition, once you begin to gather your skills as a woodworker, you may be able to sell some of your creations to make some money on the side.
Health - Although it is a benefit that is not often considered, it is possible that working with wood can increase your level of physical and mental health. One of the ways that it does so is by reducing your stress levels but there are also some benefits to working with your hands and to seeing something through to completion. As you appreciate this hobby more and more, you will appreciate the higher level of health that you are enjoying as well.
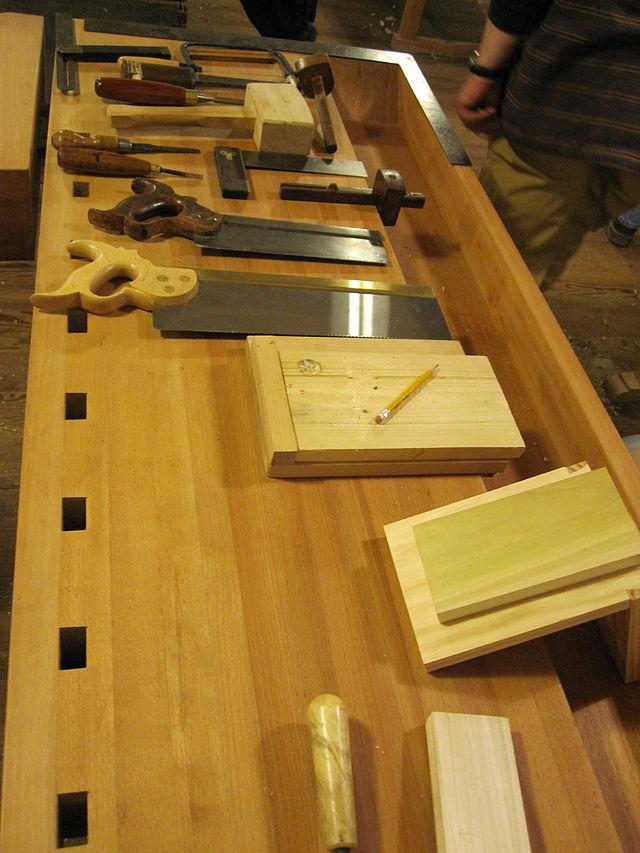
3. Tools to Have in Your Toolbox
Like any hobby, it is necessary to have the proper tools available if you want to get started with woodworking. Fortunately, it is not necessary for you to spend an extraordinary amount of money when you are just starting. It is a hobby that can be started quite simply, and as long as you have the proper tools to do the job at hand, you will find that this beneficial to you. In addition, once you buy a tool for a job, you will have it available for every job that requires it. As long as you take care of your tools, they will continue to grow in number and you will go beyond the rank of amateur quite quickly.
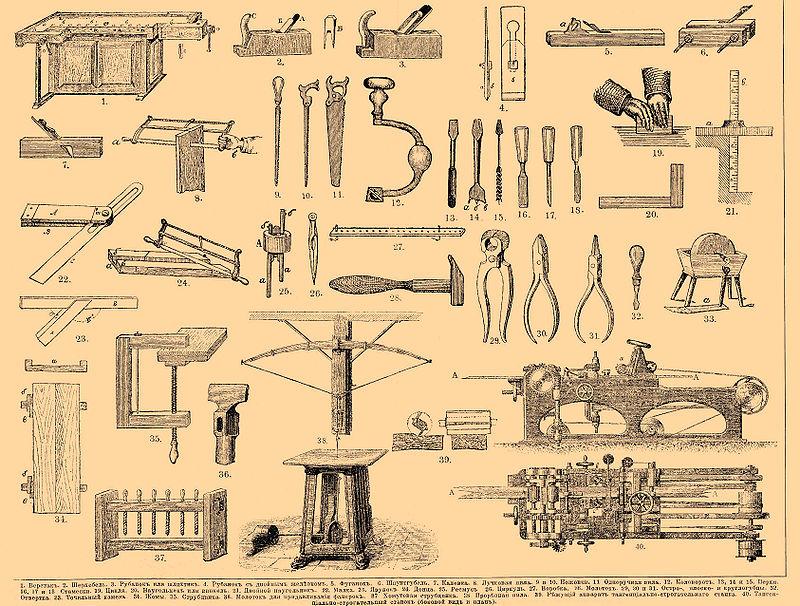
The following are some of the tools that you can have on hand for basic woodworking projects. It is not always going to be necessary for you to have each and every one of these tools, but it is a good idea for you to have as many of them as possible to fill your basic toolkit. Try to choose tools that are of high quality, knowing that they will produce better results and they will be around for a much longer time.
Tools to Help You Measure
Obviously, it is going to be necessary for you to measure the wood that you are working with if you want to create something beautiful or useful. The following are some of the measuring tools that you would want to have on hand for that purpose.
Retractable Tape Measure - There are a number of options available, but it is best if you have a 12 foot retractable tape measure to get started.
Combination Square - One of the things that you will quickly learn about woodworking is that it often works at 90° angles. A combination square will allow you to work in that way and it will provide you with the opportunity to work at odd angles as well.
Compass - If you are going to be doing anything with circles included, a compass will be indispensable as a tool.
Framing Square - This simple Square is inexpensive and you will find that it is one of the most often used tools in your toolbox.
Tools for Cutting Purposes
Cutting the wood, either quickly or accurately is something else that needs to be considered. There are an endless variety of tools available for this purpose but with the following tools on hand, you will find that it is easier to get the job done.
Crosscut Saw - This saw is one that you will use regularly to cut across the grain of a piece of wood at a right angle or at another predetermined angle.
Rip Saw - Similar to the crosscut saw, it cuts quickly when it is not necessary for you to pay close attention to detail.
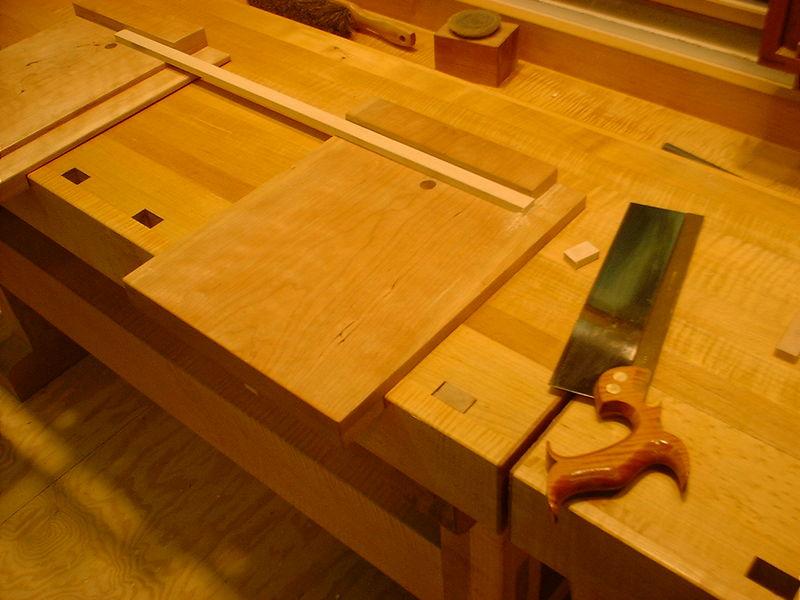
Back Saw - This saw is one that is used for quality work when the wood is being cut in a straight line.
Coping Saw - For cutting odd shapes and turning angles, this tool is indispensable.
Tools for Joining Purposes
In many cases, you will be using two or more pieces of wood and joining them together. This can be done in any number of different ways but the following simple tools should be added to your toolbox for this purpose.
Hammers - Both a claw hammer and a lighter, finish hammer, should be included in your toolbox at all times.
Mallet - A wooden mallet is quite beneficial and it offers you some diversity when it comes to the hammers in your toolbox.
Nail Set - After you have put a finish nail into the wood, you will use a nail set to push the head below the surface of the wood so that the wood can be finished properly.
Dowling Jig - When you use dowels to join two pieces of wood together, it can be a strong connection and makes for an excellent finish.
Clamps - You will quickly discover that you can never have too many clamps in your toolbox.
Bench Vice - This is another type of clamp that is stationary and it is perfect as an extra hand.
Screwdrivers - Have some quality screwdrivers on hand for obvious purposes.
Tools for Shaping Purposes
Although these tools are not always going to be used on every project, they can be beneficial if you have them available.
Wood Chisels - For removing wood and shaping it. Have a variety of sizes on hand and keep them sharp.
Planes - Have both a smooth plane and a block plane on hand to remove material from the surface of the wood that is being worked.
Rasps - A round and a flat rasp will be beneficial for removing wood in smaller areas.
Knife - Opt for a high-quality utility knife and keep extra blades on hand.
A Look at Power Tools
Although you can certainly do most of your work with hand tools, it would also be beneficial if you had a few power tools in your toolbox. These are portable power tools that can be used until you are able to purchase stationary power tools.
Circular Saw - Perfect for making a straight cut across the wood or with the grain.
Jigsaw - This tool will come in handy if you ever need to make a long cut with a turn in it.
Drills - Make sure that you have a high quality variable speed drill at your disposal. If possible, opt for a cordless drill and have plenty of drill bits and screwdriver bits on hand.
Sanders - You should have a number of different types of sanders on hand to keep the wood smooth. It would be beneficial to have a small, hand-held sander for smaller jobs and a belt sander for larger jobs.
4. Choosing the Proper Wood for Your Project
In the previous chapter, we discussed woodworking tools. In this chapter, we are going to discuss the wood that you can use. For the purpose of this chapter, we are going to talk about solid wood that has been cut from a tree trunk. Although it is also possible to use composite wood or perhaps wood that has been laminated together, it is not what we are discussing. We will simplify things as much as possible by breaking the woods down into two different categories.
Taking a Look at Softwood
Softwoods are some of the easiest to work with and they also provide you with a less expensive option when it comes to woodworking. One of the common misconceptions is that softwood is inferior to hardwood and that it is weaker but that is not true. Good quality softwood can produce amazing results. The following are a few different types of softwood that you may want to consider using.
Pine - Perhaps one of the most common types of wood is pine, and it is likely one that you will consider working with as well. There are a variety of different types of pine available, including yellow, white and sugar. Pine is commonly used for furniture and other woodworking projects at home because it is so easy to work with and is relatively inexpensive.
Fir - This is also an inexpensive choice, and it is easy to work with as well. Because of the grain pattern and the fact that it does not hold a stain very well, it is typically used when you want to paint the finished product. It is a strong wood, even though it is soft to work with.
Cedar - This type of wood, particularly red Cedar is a very popular option, not only because the beauty of the wood but also because of the aromatic scent that it emits. Red cedar can be used for a wide variety of projects, from outdoor furniture to lining the closets in your bedroom. It is relatively inexpensive in comparison with some of the hardwoods.
Taking a Look at Hardwood
Many woodworkers will prefer to work with hardwood, not because it is easy to work with but because the finished project can be quite stunning. You have a number of choices available that include different textures, colors and even patterns within the grain. It can certainly be used for the production of some beautiful furniture but it can also be used for a wide variety of woodworking projects around the home as well. Here are a few of the choices you may want to consider.
Birch - Both yellow and white birches are common hardwood options. It is easy to find, as you can typically pick up some birch boards at your local lumberyard or even at Home Depot. Although it is inexpensive, it can produce some beautiful work if it is done properly.
Mahogany - If you are going to be making any type of furniture, mahogany is certainly an option that you would want to consider. It is beautiful, wears well and will last for quite some time. The only drawback to mahogany is the fact that it is quite expensive.
Cherry - This is perhaps one of my favorite types of woods and it is extremely hard, so it will take some effort if you plan on working with it. Most cherry grain is going to be dark in color, producing a brown/red hue when it is finished.
5. Woodworking Safety
Although woodworking is a very enjoyable hobby, it is also one that requires some respect on the part of the person enjoying it. After all, you are going to be working with tools that could be dangerous, if they were not handled properly. In this chapter, we are going to look at some of the woodworking safety tips that will help you to stay safe in the wood shop. Develop safe habits from the very start and you will find that you are able to enjoy this hobby for a lifetime without any incident.

Wear Your Safety Equipment - One of the biggest issues that result in somebody getting hurt while working with wood is the fact that they weren't wearing the proper equipment. The equipment could include anything from hearing and eye protection to gloves that are worn during the sanding process or even while you're applying the finish. Never forgo the wearing of safety equipment.
No Drinking - It would be a big mistake to think that you could enjoy an afternoon of indulgence in either drugs or alcohol and then step into the wood shop safely. Although it may be possible for you to get through the project safely, you are really increasing your odds of injuring yourself seriously when you are under the influence of drugs or alcohol.
Hair and Clothing - Be cognizant of what you are wearing during the time that you are working with wood and also pay attention to your hair, if you have long hair. If you are wearing loose clothing, necklaces or bracelets, it could easily get entangled in a power tool and cause you serious injury. Additionally, wedding rings are a bad idea when you are working with certain tools, because they could get caught in the tool as well.
Extension Cords - There is no doubt that you will use extension cords during the time that you are working with wood. Although they can be handy, they can also be a tripping hazard. It is always best if you stick with a single extension cord unless it is absolutely necessary to work with more than one. In addition, be aware of the location of the saw blade below the wood and avoid contact with the power cord.
Familiarize Yourself with Power - It is important for you to turn the power tools off and to leave them off when you are doing any maintenance. In addition, you should always check the power to ensure that it is off before you plug in the tool. Know where the breaker box is in the home and which breakers power the area where you will be working.
No Reaching - Even a professional gets in a hurry from time to time, but if you want to avoid injury, you will never reach over a saw blade in order to pick something up or to move a piece of wood or other object. In fact, it is important for you to keep your fingers away from the moving blade at all times and to regularly use a push stick to avoid coming in contact with the blade.
Stay Sharp - When your tools begin to get dull, it is possible for an injury to occur. As you continue to work harder in order to accomplish a task with a dull tool, it can pose a number of problems, including binding or kickback. Keep the blade sharp and keep safe.
Stay Alert - Finally, make sure that you are aware of your surroundings and stay alert to what is taking place at all times. Although it may be enjoyable to relax and daydream, it can also be disastrous if you decide to do so.
6. Project: Workbench
Although there are many different projects that can be done around the home with wood, one of the first things that you will want to do is to build a workbench. It can be a great project to get your feet wet, so to speak, and it will also provide an area where you can continue to do your woodworking projects from that point forward.
The first thing that you should do is to determine how large the workbench needs to be. Write everything down, including the length and the width of the workbench so that you can purchase the appropriate building materials.
The general materials that you will need include a piece of sanded plywood for the top of the bench and one for the shelf underneath. You also need two eight-foot 4x4s for the legs and a few 2x4s to hold everything together. You also need some number eight screws that are at least 1 1/4 inches long and some lag bolts to hold everything together.
Cut four of the 2x4s to length according to the length of the workbench and cut another four 2x4 pieces to the width of the bench. Cut the 4x4s according to the height of the bench. An additional 2 2x4 pieces should be cut to the width of the bench, less 3 inches.
Attach 1 of the 2x4s on the side of the 4x4s at the top so that they are at an equal height. The other 2x4 should be attached further down on the 4x4s at the height of the shelf. Do the same to another 4x4 and then attach the 2x4s for the sides at the same heights. This will form a rectangle platform at an even height at the top of the bench and another at the height of the shelf. Attach it all together with carriage bolts.
Stand the 4x4s up so that the top of the workbench is up. Attach the 2 shorter 2x4s in between the top 2x4s at even intervals by drilling and screwing into the side of the long 2x4s. This will form the platform for the bench top.
Cut the plywood to the same size as the bench top and cut a second piece to match. One of the pieces will be screwed to the 2x4 platform to form a solid workbench top. Use a scrap piece of 4x4 to mark each of the corners of the second plywood piece and cut out the corners. This will allow it to fit as a shelf for the lower platform.
At this point, you have the option of putting the workbench on casters so that it can be moved around into position as necessary. If you're going to have it stationary, it is best if you use additional screws to attach it to the wall so that it is as sturdy as possible.
7. Project: Hidden Treasure Box
Do you have something that you want to hide? In this chapter, you will learn how to make a small box that has a lid that slides open from the side. When you look at it, it will seem as if it is a solid box but once the top slides open; it will reveal a secret compartment. This project is easy to make but it does require some finesse when creating the slide for the top.
You will start by making a standard box. It is possible to make it out of any type of wood but many people prefer to use a hardwood because it makes more beautiful end product. You can also use softwood if you find it is easier to work with it.
Start by cutting the two long sides and the two short sides of the box at the same time. You want them to be as close as possible in their dimensions in relation to each other. You can attach the box together by simply gluing the sides and clamping it. At this time, it would also be a good idea to make the bottom of the box and to glue it on as well.
Some people like to use small dowels in order to attach the box more securely. Depending upon the size of the box that you are using, it may be difficult for you to find and utilize dowels that are appropriate for this need. It is good practice to do so, however, and you may find that you have a higher quality product when all is said and done.
When you made the bottom of the box, you should have made the top as well so that they were the same dimension. You will then cut the top of the box on the long edges so that the bottom of the cut is longer than the top. This is what is going to form the slide mechanism within the box so make sure that you get the angle as close as possible. If you have a jigsaw that bevels, it can make for a very accurate cut.
The difficult part is cutting the sides so that the angle is the same as what it is for the top piece. Many people find that it is best if they cut down into the side and then take the excess material out with a small chisel. It is important for you not to rush this process, because it is what will make the box unique and you want it to be as close as possible so that it works smoothly and remains tight when it is not being opened.
After you have the box put together, you should sand the entire outside as a single piece. This will help to get rid of any imperfections in the edges where the joints took place. Finish the box with some polyurethane and you will have a beautiful addition to keep on your bookshelf and to hide small trinkets from sight.
8. Project: Wooden Toy Box
Building a wooden toy box is an excellent project. Not only can it be something that remains is a keepsake for years to come, it is also a project that can get the family involved as well. A wooden toy box can be a very simple project but it really can be as difficult as you want it to be.

You will first need to purchase the materials for the toy box. In some cases, you may want to purchase large sheets of high quality plywood for this purpose but you can also use single boards that are attached together in order to form the sides, bottom and top. You will also need some concealed hinges and some toy box lid stays, which will help to keep the box open. Although it is not necessary for you to use casters for the feet, you may wish to do so.
First of all, you should cut the individual pieces to size. Obviously, you would need to cut two of the pieces for the back and front and two for each side and they should match as closely as possible. As you cut the pieces, you may wish to lay them out in a specific pattern so that you know how much you have already cut and what remains to be cut.
If you are using a single sheet of wood for the sides, you can skip to the next step. For those that chose to use individual boards, it is best if you attach the boards together using some dowel rods. Drill into the edge of the boards approximately 1/4 inch in matching sets on each side of the boards and use a small dowel pin with some wood glue to attach them together. Clamp the boards overnight until they have completely set.
One of the mistakes that some beginning woodworkers make is that they try to attach the sides together directly. Although it may be possible to do this in some types of projects, a toy box is likely to see a lot of wear and tear so you want it to be attached together as securely as possible. The easiest way for you to do this is to cut some smaller pieces of wood, perhaps a 1 x 3 that will go in each corner of the inside of the box. The exterior pieces can be attached to the interior board with screws or by pinning it and gluing it. It will hold together nicely and it will stand up against the wear that it is likely to see.
You should now attach the bottom of the toy box using dowel pins and attaching it in each of the four corner pieces as well as along the edges. Space the dowel pins out approximately every 6 to 8 inches and you will have a solid base. If you feel as if the box is going to see excessive wear, it may be best if you build a lower frame and attach it to the side frame of the box. This will give you something solid to attach the bottom to once it has been crafted.
Finally, attach the top with the concealed hinges and attach the toy box lid stays to the sides and the top. At this point, it should be a completed project and it is just waiting for you to sand it and put on the finish. If a small child is going to be using the toy box, be careful not to use a finish that would be harmful if swallowed.
9. Project: Candle Holder
Although there are a lot of projects that you can do at home and they will be interesting, making a candle holder is a great choice. Not only is it easy to make, it also makes a great gift. You can also make it unique and, if you use upgraded hardwood, it can be very beautiful. In this lesson, we will consider some of the options that are possible to make a candle holder and you can use your imagination from there.

First of all, you will need a solid plank of wood. It should be at least twice as wide as the candles that it will hold. You can choose any size candle but many people find it to be convenient to use a votive, because they are the same size from one manufacturer to another. They are also easy to find, and most people have them lying around the house. Choose a plank of wood that is 1/2-inch thick because you will be gluing a second plank onto it and it will be 1 inch thick when it is complete.
The first thing you should do is to cut the 2 planks to size. Make sure they are identical to each other. As was mentioned, you should make the width of the plank double the width of the candle. The length should be 7 times as long as the candle width. This will allow for 3 spaces for candles to be included.
Choose one of the planks for the top. Try to choose the one that has the most interesting grain. If you use a hardwood, such as cherry, the grain will really come out nicely when the project is finished. Cut the plank to size, slightly rounding the 4 corners to soften the look.
After the planks are cut, you should find the centerline of the plank, and mark it lightly with a pencil. Measure to find the center of the plank as well, and that will be the center of the middle hole. You can use the candles to mark the circle or you can measure and use a protractor. If you use the candle, make sure you leave a little room on the edges so the candle is not too tight in the hole.
Measure from the center down the length of the plank to mark the holes for the other 2 candles. The distance should be proportionate and there should be at least half a candle width from the outside edge of the candle hole to the edge of the board. Mark those areas as well using a protractor or the candle as a guide.
You will now need to cut the holes from the plank that you marked. The easiest way to do this is to drill a hole inside of the future hole near the edge and use your portable jigsaw to cut out the hole cleanly. Use a fine toothed blade and take your time. Although it is possible to clean up the hole later it is much better if you keep it clean when you cut it. Do the same for the other 2 holes and then test them for size.
Use a rasp or a folded piece of sandpaper to clean up the edge of the holes and make them smooth. You may also want to slightly round the top of the hole’s edge to soften it.
Glue the two planks together face to face. Make sure that the side you chose earlier is the one that is facing upward. Try not to get any glue into the exposed area in the hole cutouts. Clamp the pieces together and allow the glue to dry overnight.
Now that the candleholder is taking shape, you should sand the top, bottom and sides with progressively finer sandpaper, starting with 100 and ending with 220. If there are any overlapping edges where the pieces were glued together, you may need to put the candleholder in your bench vice and sand the edge with a belt sander. You can also remove some of the material with a surface plane. Be cautious not to remove too much material, and if you clamp it, use some scrap wood between the candleholder and the bench vice.
You can use sandpaper to round the edges of the candleholder slightly. It is also possible to put a nice edge on it with a router. If you don't yet have a router, it may be a good opportunity to buy one. It is a tool that you will use over and over again.
Finally, give the entire piece a good sanding to make sure it is smooth and to remove any small imperfections. Use Polyurethane to put a shine on the wood and to bring out the beauty of the grain. Once it has the chance to dry, it is ready for use or to give as a gift.
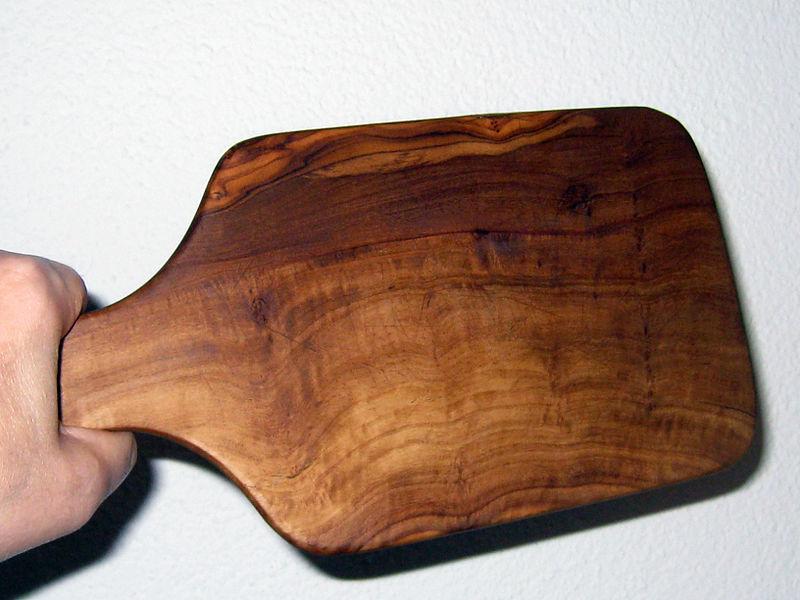
10. Project: Cutting Boards
Another great project for the beginner woodworker is to make cutting boards. They are a project that is easy to do and you will appreciate using them, each and every time you pull them out of the cupboard. Of course, there are a wide variety of options available for making cutting boards, including some that are quite unique. In this chapter, we will consider how to make a basic cutting board and a few options to consider to make them uniquely your own.
As is the case with many of the woodworking projects we discuss in this publication, it is important to start with the right type of wood. For many beginning woodworking projects, a softwood choice, such as pine will be appropriate. It is easy to work with and inexpensive. When you are making a cutting board, however, it is important to use a hardwood, such as cherry or mahogany. Not only will the finished product look fantastic, it is a better choice for the type of work that will be done on it.
After choosing the wood, you will design the cutting board according to the needed dimensions. It really doesn't need to be anything elaborate, you just want to cut it out and sand it until it is smooth as glass. You can also cut it with a handle, if you want to make the project more convenient.
Although you can do a basic cutting board, as we described, it is also possible to customize it in a number of ways. One of the top ways to do so, however, is to use blocks of wood glued together as a plank to make it appear more as a butcher block. If you decide to do it this way, you should choose 2 contrasting but complimentary pieces of hardwood and glue then in a pattern, alternating from one type of wood to the other with each plank.
It is best if you keep the planks fairly small, perhaps 1 or 1 1/2 inches wide each. They will need to be cut precisely in order for it to work, because you would not want any noticeable gaps in the wood. It is possible to use a circular saw to do this, but you will need to clamp the wood securely when you are working with it and use a straightedge to guide the saw. Cut with the grain to form your planks. Sand then with a belt sander or by hand, but be careful not to round the edges.
You can clue the pieces together without pinning then but it is imperative that you keep the top and bottom as smooth as possible when clamping the wood. It is better if you use a jig to drill out the holes for the dowel pins, as they will keep the pieces from moving while they are glued. It will also result in a stronger bond that will stand up to years of use.
One other option that you may want to consider is making a cutting board with a cutout that runs around the edges. This will make a very decorative project and it is also functional, because the groove will allow juices from the food you are cutting to be kept away from the working area.
The process of making this type of board is similar to the way that you would make a standard cutting board. After you have the project well along and are ready to finish it, a plunge router will be used to make the groove with a specialty bit. It is important to measure out the groove carefully in advance if you are going to make it decorative. If you are keeping the groove in line with the edge of the cutting board, you can simply set the guard on the router for that distance and allow it to follow the edge.
Regardless of the type of cutting board you plan on making, it is a good idea to finish it before it gets put into use. For many woodworking projects, you will use a stain or perhaps polyurethane to bring out the grain in the wood. For any project that will be used in the kitchen, however, you will want to make sure that the finish is food grade. The best choices for finishing a homemade cutting board are either walnut oil or another type of butcher block oil. Rub it into the wood and give it a few days to soak in. It will provide a beautiful finish that will stand up to use for many years.
11. Project: Jigsaw Puzzle
Do you enjoy making puzzles? If you do, you will love making your own out of solid wood. This is a project that can be made quickly and easily but don’t let the time fool you. It is a great project with an almost endless variety of choices. Homemade jigsaw puzzles make great gifts and they really give you the opportunity to get creative with your work. So, regardless of whether it is for a child in your life or if you want something to challenge a friend, this project is one that is well worth the effort.

For a jigsaw puzzle, it is not necessary to spend a lot of money on a high quality piece of wood. You can use a large piece of pine or even some 3/4” plywood. Since you will be painting the wood or decorating it in some way or another, buying a beautiful piece of hardwood will really be a waste. If you do want to use hardwood because it its durability, choose a nice piece of mahogany. It will stand up to some abuse and you will not miss the grain quality once it is painted.
This is when the fun begins. You want to draw the picture, any picture, that will be on the finished puzzle. Make it large enough that the pieces will not be too small and difficult to cut out. It is also a good idea to only sketch a rough drawing at this point. You will be able to get into the fine details further along in the project. Although you can draw anything, it is best if you keep the overall concept somewhat simplistic. It will make for a better finished product.
Now that you have the rough idea sketched out on the board you will want to draw the edges of the individual pieces. The rough sketch will be in pencil but you can use a fine tipped marker to draw the cut lines. It is important to make them stand out so they are easy to see once it comes time to cut them. The edge of the puzzle also needs to be defined and sketched. Most puzzles tend to follow the general contours of the puzzle drawing but it is also possible for you to make it any shape you like. There are no rules.
Begin by cutting out the edge of the puzzle. For cutting out the edge and the puzzle shapes you will use a portable jigsaw with a fine toothed blade. You can also use a coping saw, but it is easier to use a jigsaw. It also tends to make cleaner lines and gives you more control.
After the edge of the puzzle has been cut out take the time to soften the edges and smooth them with sandpaper. If you use a piece of hardwood, you may need to start with 100 and work your way to 220 sandpaper, but if you use plywood or a softwood, you can start with 180 grit sandpaper. Be cautious that you don’t damage the edge of the puzzle while you are working on it.
The individual pieces can also be sanded but you need to be careful that you don’t distort the edges or the puzzle won’t fit together well. You will already have a slight gap because of the width of the jigsaw blade but if you used a fine blade, it won’t be overly noticeable.
Finish the project by painting each individual piece. Some people put the puzzle together and paint it at one time while others paint each piece individually. It really depends on your confidence level and personal preference as to which you want to do. You can add a coat of polyurethane if you want to protect the painted finish.
12. Project: Chopsticks
Are you looking for a simple woodworking project to get started? One of the easiest pieces that can be made is a pair of chopsticks, but that doesn't mean that they are a lower quality choice. As a matter of fact, you can take this simple project and really put a unique spin on it. It is also possible to make them from nature, which is something we will discuss in this chapter as well. To begin, we will discuss the simple way to make your own chopsticks at home and from that point, we will consider some of the options that are available.

The first thing that you will need to do is to choose the wood that is used for the chopsticks. There are a wide variety of choices but if you want to get started quickly, you can use a dowel rod. Don't think that it is necessary for you to use a substandard piece of wood for this project. Although there are simple pine dowel rods, you can also buy hardwood dowels in a wide variety of choices.
Most chopsticks come in a standard size, but you don't need to stick with those limitations. If you feel comfortable using longer or shorter chopsticks, there are really no rules as to how long you can make them. As a basic guide, however, an adult chopstick will be approximately 10 inches long. If you are making a chopstick for a child, it will typically be about 6 1/2 inches long. They can be smaller for a smaller child.
Beginning about halfway down the dowel, you will begin to thin them until they are approximately half the size of the original dowel. It will take some time to do this and you should carefully remove only a small amount of wood at a time. Any sharp knife can be used for this purpose, including a good pocketknife or even a kitchen knife. Be careful if you use a utility knife because it can quickly remove too much of the wood, and it is easy to cut yourself.
Once you have the general shape of the chopstick, it is time to put the finer touches to it. At this point, you will probably have some harsh edges and perhaps a rather blunt end. Using some sandpaper held in the palm of your hand, you will gently smooth out the chopstick and round out the end. Take your time and use fine grit sandpaper, such as 180 grit. It will take some time but it is well worth the effort.
After you have the chopsticks shaped properly, you will want to finish them. If you leave them as raw wood, they will stain easily and soak in the juices from the food that you are eating. It won't take many uses before they are not suitable for use.
Be careful not to use anything to finish the chopsticks that would make them hazardous to use. As is the case with any food grade product, you would want to avoid harsh chemicals, such as polyurethane. The best choice for chopsticks is to rub them with walnut oil or chopping block oil. You can also use other types of oil, such as coconut oil. Allow it to soak into the chopsticks and then wipe off the excess. Several coats may be necessary.
Chopstick Options
As is the case with any simple woodworking project, there are also some upgraded and unique options for making chopsticks.
Authentic Chopsticks - If you really want to create something interesting, you can make authentic chopsticks the way they were made hundreds of years ago.
Traditionally, chopsticks were made from bamboo, so you will need a source of this wood from somewhere. It tends to grow well, so you can either grow your own or find some growing in your area. If you do grow it on your property, be aware that it can easily take over and be difficult to control.
Cut the pieces of bamboo and soak them in boiling water for several minutes. This will help to soften the wood and allow you to remove the outer layer. After doing so, set them to the side to dry for a few hours.
Use a pocketknife or some other type of knife to whittle the chopsticks down to size (see the chapter on whittling). It isn't going to be perfect, but when you use them, you will have the satisfaction of knowing that you created them in the same way that they were created years ago.
It is also possible to make chopsticks from any type of tree branch in a similar manner. Just clip off the branch, boil it and peel off the bark. Whittle it down to size and you have something unique to use while eating your food.
13. Project: Boomerang
Many of us are fascinated with the boomerang, and for good reason! After all, it is odd to think that you can throw a piece of wood away from you with all of your might and have it come back to you again, yet that is exactly what happens. Of course, you would need to make it properly, and that is what this chapter is designed to do. Not only will you know how to make a proper boomerang after reading it, you will know how to throw it as well.

First of all, there are many different types of boomerangs and many of them work quite well when they are used properly. For the purpose of the article, however, we are going to consider one particular method of making the boomerang that tends to work very well consistently.
For this particular project, you will need to download the plans so you can print them out and use them for the general shape of the boomerang. Although you may be close to making one that will work well if you do it from scratch, using a proven shape and design will help things to work better. There are quite a few options available, including one design that is known as the Seabreeze. You can search Google for the plans and find it available for free to download. Print it out as-is and you have the beginnings of a working boomerang. There are 2 pages that need to be printed and taped together for it to work.
It is also important to choose the right type of wood for the project. You want a wood that is both light and durable, such as birch. It is possible to buy a sheet of 1/4" birch plywood as a relatively inexpensive price. Don't worry about having too much wood when you buy a sheet of plywood. Once your friends and family see how well it works, they are going to want one too.
Cut the piece out carefully using your portable jigsaw. Use a fine toothed blade to keep from causing too much damage to the material as you are cutting it. If you find that it is splintering on the bottom of the piece of plywood while you are cutting it, you can put a piece of painters tape on the bottom of the plywood where the cut is being made. You may also need to use a new blade.
You will need to sand the edges according to the diagram and instructions as well. They call for very specific angles, such as a 45 degree and 30 degree angle to the edge. You can use a palm sander for that purpose and the cutout that you used as a diagram will also guide you in how to sand the edges of the wood. Work progressively from 100 grit sandpaper up to 220 for a smooth finish. Be careful to check your work on a regular basis. Since you will be removing a considerable amount of wood from the edges, it is not difficult to overdo it. Remember, you can take more wood off but you can't put it back once it's gone.
Once the edges have been sanded to the appropriate angle, take the time to go over the entire boomerang with sandpaper as well. It won't necessarily help it to fly better but it's nice when the entire project is smooth.
You can finish the project however you like. Some people just like to use the raw wood but you can also add a coat of lacquer to make it shine and to bring out the wood grain. It is also possible to give it the final finish by painting it.
Now that the boomerang is made, it is time to throw it and watch it come back to you again. The general guidelines that are provided are for a right handed thrower. If you are left handed, you should reverse the image for how you create it and how you hold it.
Choose an open area to throw the boomerang, as it may do some traveling before it comes back to you. It is also a good idea to choose a relatively calm day, although a slight breeze is preferred for most boomerangs. Throw the boomerang into the wind for the best results.
Hold the boomerang in your right hand. You should grip it loosely near the bottom or pinch it between your thumb and the side of your index finger. Throw it in an overhanded motion with the open end of the boomerang as the leading edge. The release should be near the apex of the throw.
If all goes well, the boomerang will fly straight away from you, climb slightly and take a long, arching path back to you again. Make sure that anyone that is standing near you is aware that you are throwing it because it may not come directly back to you until you get the hang of it.
14. Project: Wooden Hide-a-key
We have reviewed a number of simple projects in this publication. Keep in mind that just because something is simple does not necessarily mean that is it substandard. That is also the case with this project. Although it may look rough on the outside and perhaps even unfinished, it is an excellent project that has a very specific purpose, that of hiding a key so it cannot be found by others. It can be quite a convenience when you lock yourself out of the house, and it makes a great gift.

The requirements for this project are rather simplistic. You will need a power saw, some glue, clamps and a piece of tree branch. Try to choose a branch that is fairly thick, perhaps 1 ˝” in diameter. It doesn’t matter what type of tree it comes from, you just want it to be a sturdy piece of wood, approximately 6 inches in length. You can cut it off on both sides or choose a piece that is broken naturally to make it even less conspicuous.
Using a power saw and clamps (keep your fingers clear of the blade), cut off a small slice from the top and the bottom. Keep the scraps because you will be gluing them back into place again.
Take the main part of the branch and cut off a third side. This will give you easy access to cut out the compartment without having to drill through the wood. You should cut three sides of the compartment in the main piece of wood. The side piece that was cut off will form the fourth side once it is glued back into place. Clamp the sides together carefully (make sure they match) and leave it overnight for the glue to dry.
Next, glue the bottom in place and clamp it overnight to dry.
Finally, drill 2 small holes for a dowel pin. Leave a small portion of the pin sticking out of the holes and glue them in place. Drill holes to match in the top piece that was cut off of the branch. It should now be able to be put together with the keys inside. Hide it in a nearby bush and you will be prepared in case you get locked out of your home again.
15. Learn How to Whittle
Although there are many different methods of working with wood, it is likely that you will eventually choose one that is specific to your needs. Throughout this publication, we have discussed many different methods of working with wood, although most of them used power tools and sandpaper. In this chapter, we are going to take a step back and look at the hobby of whittling. It is a time honored tradition that is both relaxing and unique in what it makes available.
First of all, there are no real rules when it comes to whittling. All that is really needed is a good piece of wood to use as your original stock and a sharp knife. Both of those factors will be considered in this chapter. It is also necessary for you to have the time to do it. Once you get started, you will find that it is possible to set aside the time, even in a busy schedule.
First, you will need to choose the wood that you will use for the project. Most people like to work with a softer wood, such as pine but if you are industrious, you might enjoy using a harder wood as well. If you want to use a more time honored method, go to the woods and choose a hunk of wood to get started. Otherwise, you can pick up a block of wood at your local lumber yard.
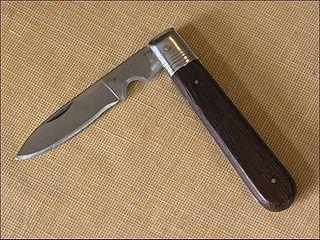
The knife you use should be sharp at all times. Not only will it make it easier for you to remove the wood as you are working with it, it keeps accidents and injury to a minimum. Most people will use a pocketknife that has some form of sentimental value, but you can use any knife, including some that are made specifically for that purpose.
When you first get started, you should be able to see the finished project in your mind. Have a clear image and make it come to life as you work with the wood. It may also be necessary for you to follow the wood itself and what is revealed as you are whittling. Don’t be surprised if the grain of the wood or any imperfections continues to shape the idea of what you are doing as you go along.
Work slowly as you whittle. It is not a race, and removing too much wood at one time can quickly ruin days or even weeks of work. Although you can allow your mind to drift while you are whittling, always be aware of what you are doing. Remove small pieces of wood with each motion and use the knife in different ways to shape things as you go.
The process of whittling is somewhat of an art form. As you learn more about it and practice it in real life, you will notice that it is truly taking shape in front of you. It is an old method of working with wood but if you really want to enjoy the hobby of woodworking, you will give it a try.